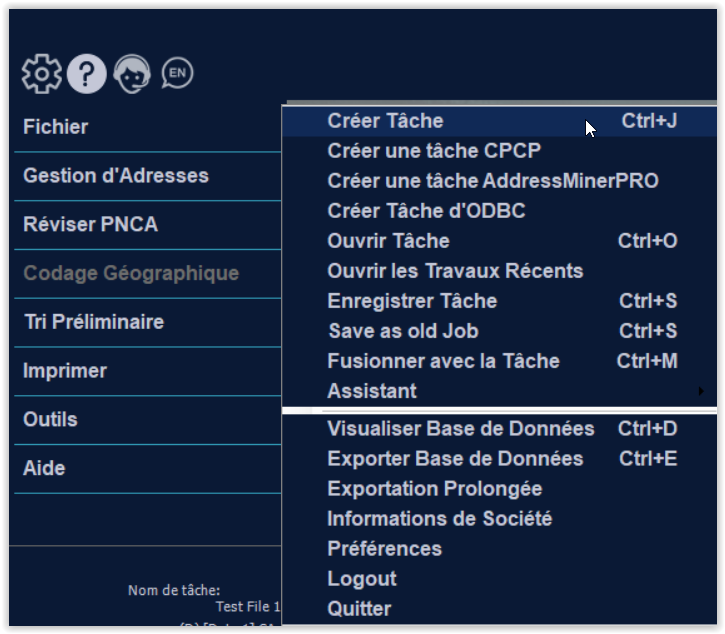
Créer une tâche
Pour démarrer une nouvelle tâche, sélectionnez « Créer une tâche » dans le menu Fichier.
Sélectionnez la base de données et cliquez sur « Ouvrir » ou double-cliquez sur la base de données. Une fois votre base de données ouverte, un écran apparaîtra pour continuer avec les étapes suivantes.
Plusieurs tables dans une base de données
Si plusieurs tables existent dans la base de données, une fenêtre apparaîtra répertoriant les tables et le nombre d’enregistrements dans chaque table. Sélectionnez le tableau que vous souhaitez utiliser, puis double-cliquez ou cliquez sur « Terminé ».
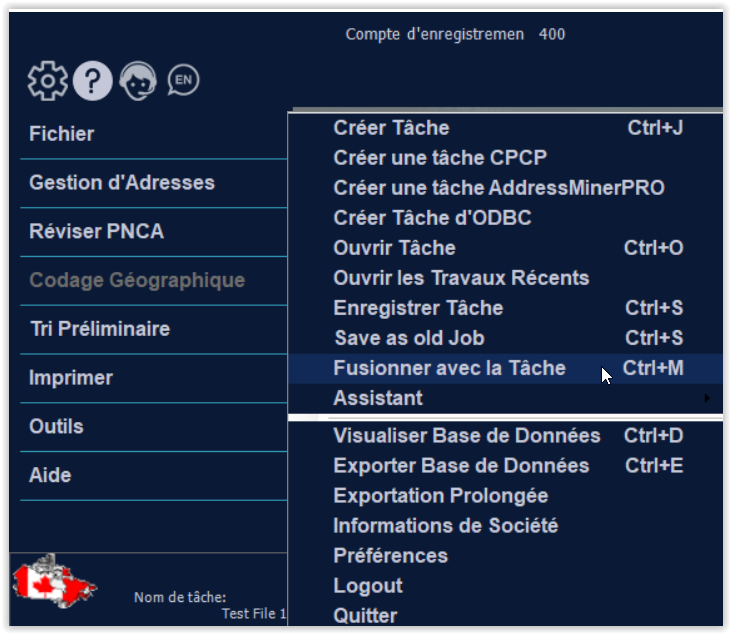
Si vous avez besoin d’importer plusieurs tableaux à partir de la même feuille de calcul, vous devrez répéter ce processus en utilisant la fonctionnalité Fusionner dans le travail pour chaque tableau.
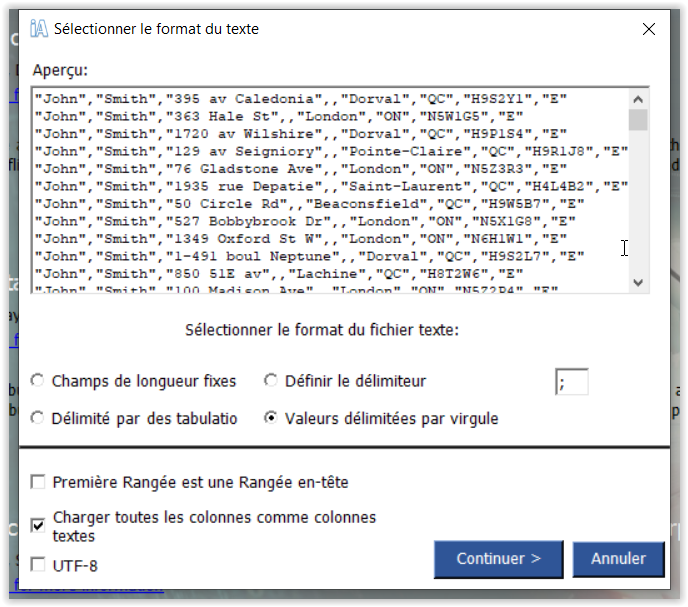
Fichiers texte
Si vous avez sélectionné une base de données texte, la fenêtre suivante apparaît :
Choisissez le type de fichier texte, indiquez si votre première ligne est une ligne d’en-tête et si vous souhaitez charger toutes les colonnes en tant que colonnes de texte (recommandé) et cliquez sur Continuer. Si vous avez choisi un fichier de longueur fixe, un écran apparaîtra vous montrant quels champs iAddress™ a auto-détectés. Vous pouvez apporter des modifications à votre fichier et charger ou enregistrer des modèles. Lorsque vous êtes satisfait de vos modifications, cliquez sur « Créer une tâche ».
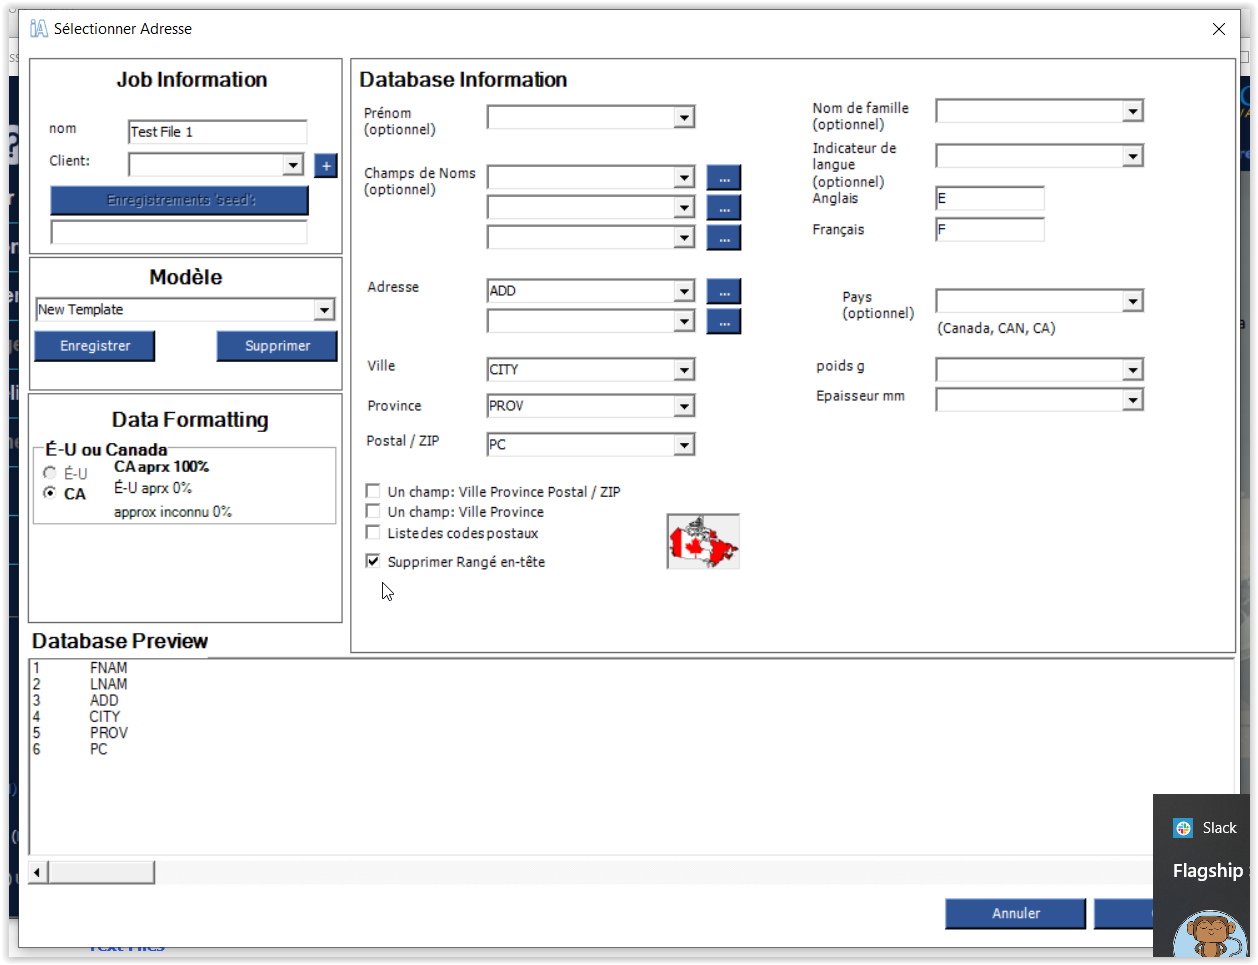
Selecting Address Fields
iAddress™ will automatically attempt to match the database fields to the appropriate iAddress™ fields. You can override these entries and select fields iAddress™ was unable to locate. From the drop down list under each iAddress™ field, scroll and select the database field that corresponds to the information required by the program.
- Click the down arrow below the Last Name field to bring up the drop down list
- Select the field that contains the Last Name information
- You can assign a name to your job. If you do not assign a name, a default description for your job will be used.
- Ensure you have filled in all required fields and any of the optional fields, then click “OK”.
Single Field Data
Canada:
- City, Province and Postal CodeOM, you must check the “One Field: City Province Postal / ZIP” box
- City and Province, you must check the “One Field: CityProvince” box
US
- City, State, and Zip CodeTM, you must check the “One Field: City State Zip(Zip+4)” box
- City and State, you must check the “One Field: City State” box
You will then be prompted for the field name containing this information
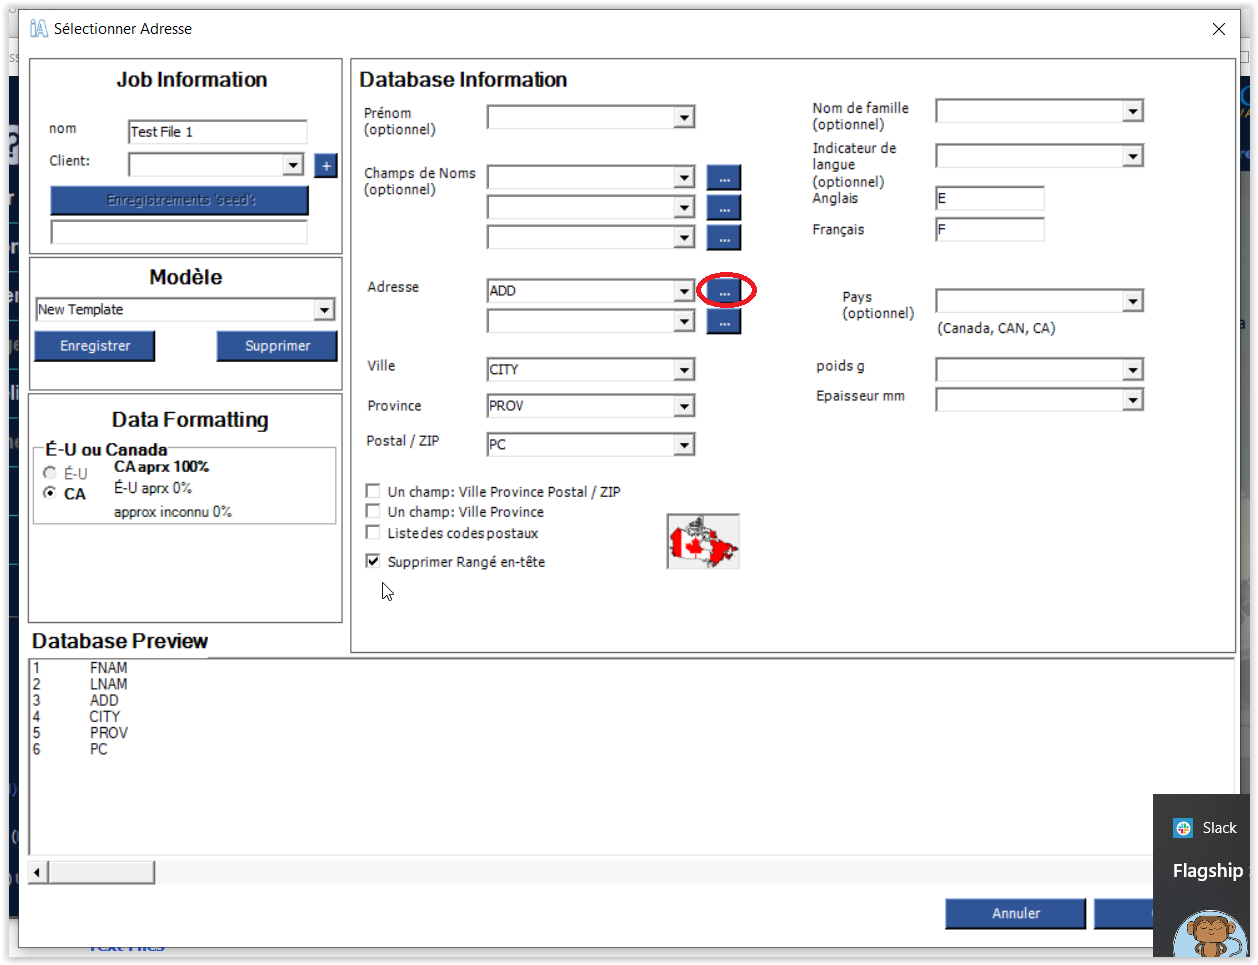
Multiple Field Components
- If your address is split into many field components (eg. apartment, street number, street name, etc.), click the button to the right of the first address line. Select all address line components in the order you want them to appear and click Done.
Language Indicator (Canada)
- If your database has a field that indicates whether the entry is French or English and you wish to use this information in your correction, select the appropriate field from the drop-down menu. Beside each language, enter the appropriate code.
To view your data
- If you are unsure of the data contained in the fields, use the horizontal scroll bar below the database box to scroll left and right. This scroll bar will also allow you to see what will appear in the iAddress™ fields. Fill in any field, then scroll left and right.
Using Templates
- If you frequently create jobs using the same data file, you can create a template. This template stores the field information so you do not have to select your fields when creating a new job.
Character Set
- This option tells iAddress™ what type of system the data originated from so that it can “translate” various computer codes. The default is Windows; some users require OEM if their data did not originate from a Windows-based system.
Using Customer Information
- If you have entered information on your customers under Company Information, you can use the drop-down here to select them. This will display their name and their associated USPS or Canada Post account number on reports.
Remove Header Row
- If you are using an Excel File and the first row contains the column headers, select this option to use the first row as column headers.