Geocoding
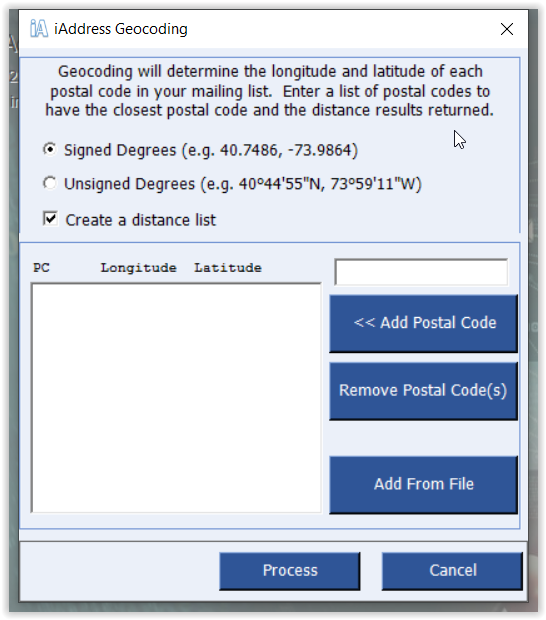
Geocoding will add location information to the data in your current job. The Geocoding menu option becomes available only after your job has been validated. The Geocoding screen has a few options for you to choose from.
For the first option, you may choose signed, or unsigned degrees.
After choosing the type of degrees, you may simply press “Process” to have iAddress™ add the latitude and longitude information to your addresses.
As an additional feature, iAddress™ can also use a list of Postal CodesOM and compare them to your addresses. iAddress™ will return a list of the distance to the nearest Postal CodeOM out of that list provided. You may add these Postal CodesOM from a separate file, or add them one at a time manually.
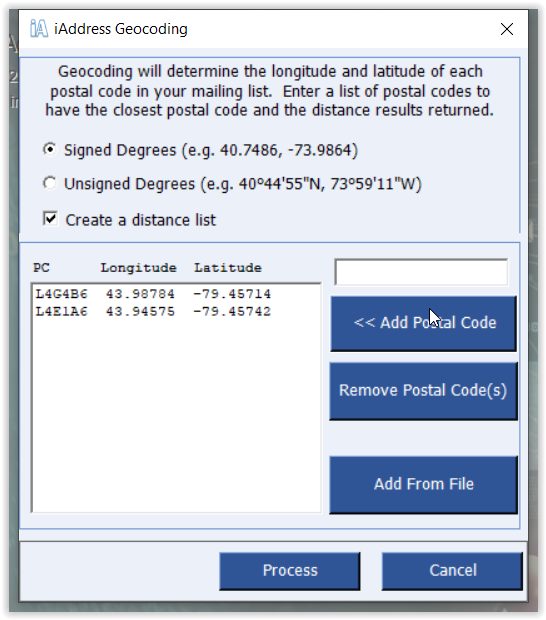
To do this, check the “Create a distance list” option. Next, type a Postal CodeOM you wish to add to the list into the text box and click “Add Postal Code”.
A distance list may be created based on multiple Postal CodesOM as well. This feature could be used by businesses who have multiple business locations and they want to mail to the closest addresses.
These Postal CodesOM can also be added from a file. To do this, click the “Add From File” button.
Select your file.
When the desired selection has been made, click the “Process” button to process your file.
iAddress™ will let you know when the Geocoding has completed.
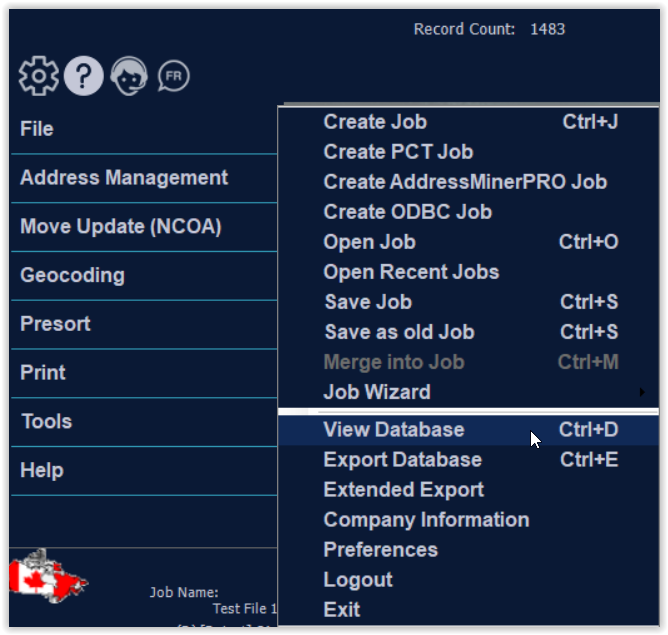
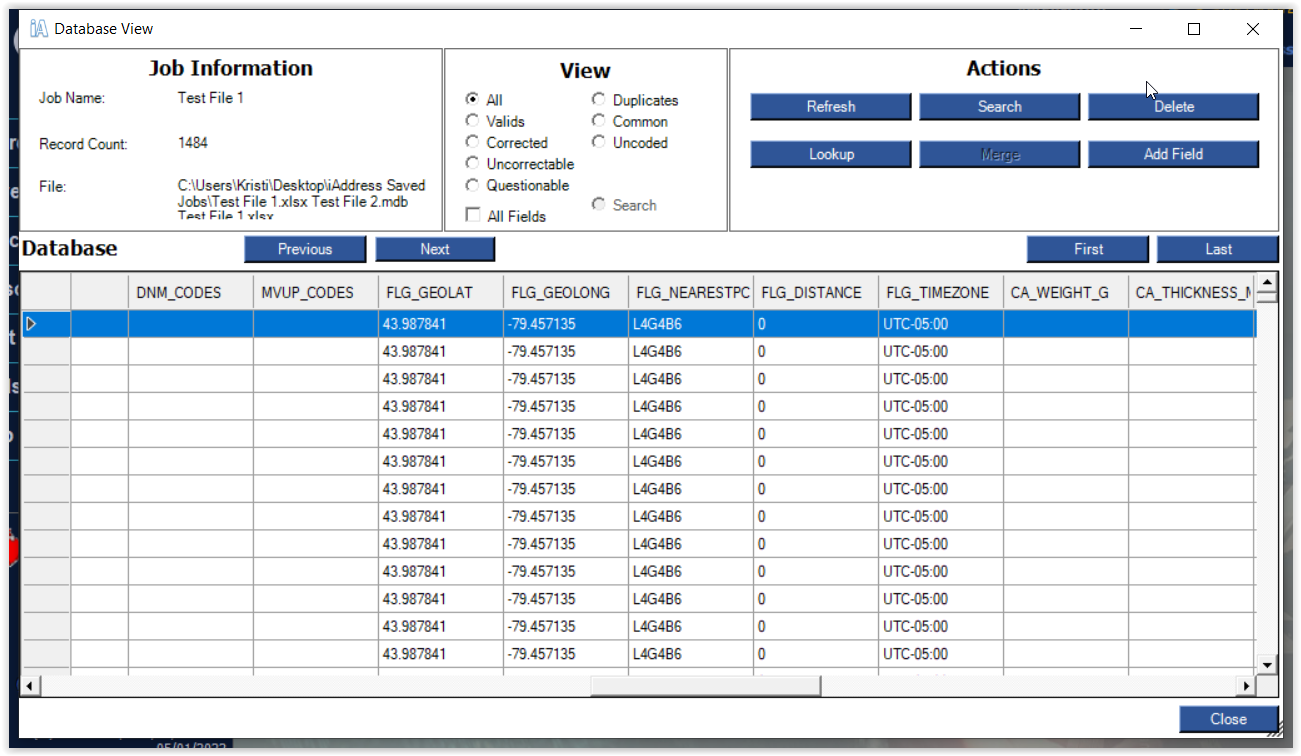
To view the Geocoding results, click on the “View Database” option in the “File” menu.
The Geocoding process adds extra columns to your data. Scrolling to the right using the horizontal scroll bar you will eventually encounter these columns. The columns are:
- FLG_GEOLAT – The Latitude of the address’ PC.
- FLG_GEOLONG – The Longitude of the address’ PC.
If you Geocoded with a PC list you will also find:
- FLG_NEARESTPC – This is the nearest PC in the list to the address.
- FLG_DISTANCE – This is the distance from the address’ PC to the nearest PC from the list.
After you have your Geocoded results, you can use the filtering tool for targeted mailings. Under the Address Management menu, click on Filter Mailing, and choose the Geocode Filter:
On this tab you can remove records from your database based on three options:
- Remove the records that did not Geocode.
- Remove records based on the distances that were generated from your distance list.
- Remove a number of records starting from those closest or farthest away from the Postal CodesOM in your distance list.
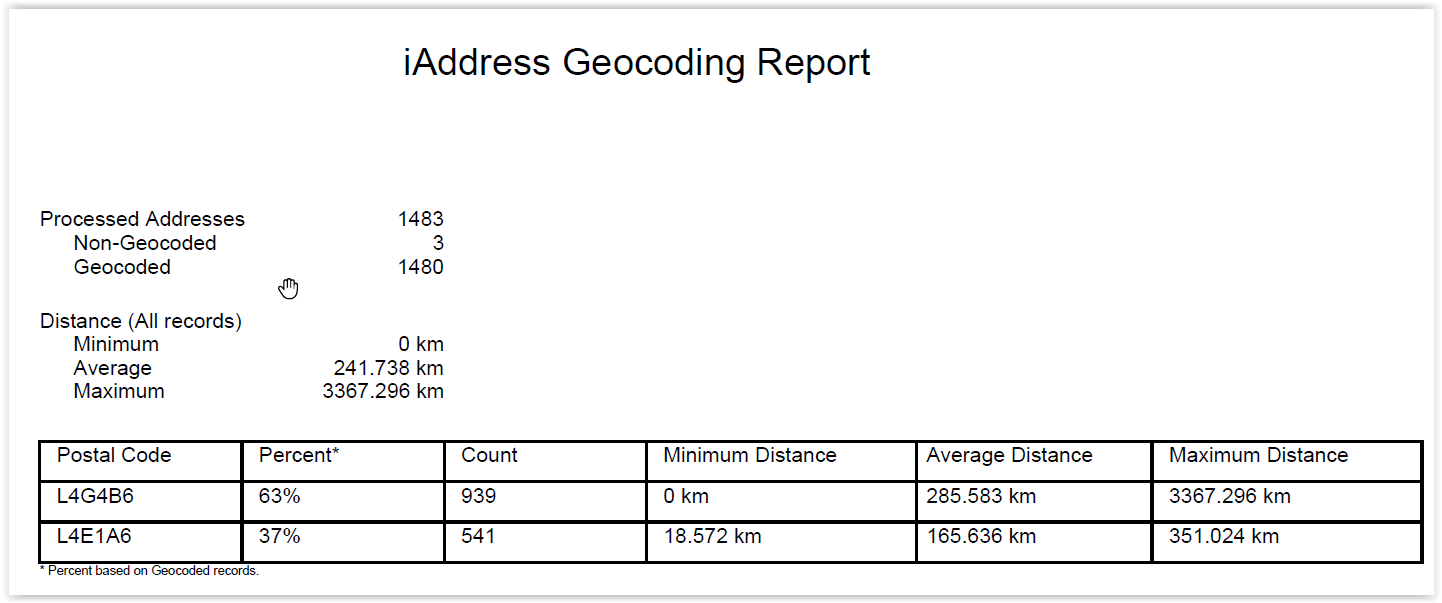
You can also view your geocoding report by clicking “Report” in the geocoding menu.
Your report will look something like this->