
Postal Code Targeting
Creating PCT Mailings with iAddressTM
PCT mailings include a non-personalized address (i.e. no recipient name). There are 2 ways to create this print file:
- Work with Canada Post’s data team. This takes longer but does provide access to a fuller range of demographic data than is available in iAddressTM.
- Create the file through the iAddressTM PCT Module in real-time, using the instructions below.
- Importing your Target Postal Codes
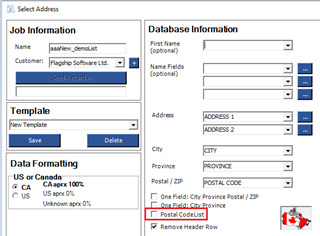
Select File>Create Job and select your input database. You can choose:
- A list of postal codes
- A list of addresses
If you are importing a list of postal codes, you must check the “Postal Code List” box on the Select Address screen.
- Using a Suppression or Seed List (Optional)
To add these lists, select File > Merge into Job for each list. Please note these lists must be full addresses.
Run Address Management > Correction/Validation to activate these files in the PCT module.
- Creating a PCT List
Select Address Management > Postal Code Targeting.
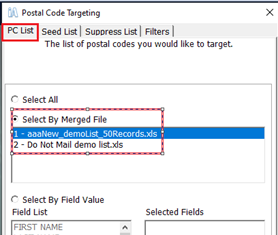
If you have included a suppression and/or seed list, identify the appropriate file on the PC List, Seed List, and Suppress List tabs. On each tab, click Select By Merged File and select the correct filename.
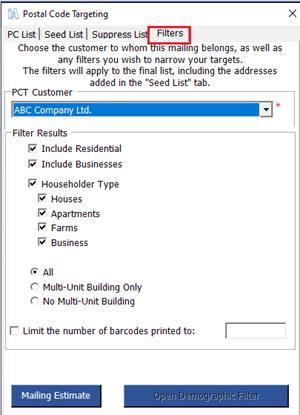
Click the Filters tab and select the following information:
- MANDATORY: The customer the PCT mailing is being produced for. This drop-down will include all entries in your iAddress™ customer database.
- OPTIONAL: Any inclusions or exclusions you want in the final PCT list.
- OPTIONAL: The maximum number of pieces (referred to as barcodes) in the mailing.
Click Mailing Estimate. A report will be produced with the following information.
- Job name, date, and time
- Total number of pieces created
- Total mailing price
- Statistics on the PCT job
You can make changes to the job by revising your Filters criteria and clicking Mailing Estimate again.
- Creating a PCT Mailing
Once you are satisfied with your PCT job, select an option to continue.
- Converting your results to a print file:
If you wish to create a Machineable or Special Handling or want to create labels for your PCT mailing, click Convert to Mailing List. This will return you to the Select Address screen with the PCT addresses as the input file. You will be warned that the PCT data will overwrite your original input data. Select Yes to continue.
Continue to Presort > Sort and select the appropriate Postal Code Targeting option.
- Converting your results to a print file:
If you only want a print file of your PCT results, click Create Mailing. A summary report will be produced along with a file of PCT addresses.
- Designing and Printing your PCT Mailpiece
Your PCT mailpiece must conform to Canada Post’s design specifications for PCT mail including the appropriate indicia. The following links are current at the date of posting.
Smartmail Marketing Customer Guides:
https://www.canadapost-postescanada.ca/cpc/doc/en/support/customer-guide/smartmail-marketing.pdf.
Canada Post Postal Indicia Tool:
https://www.canadapost-postescanada.ca/cpc/en/tools/postal-indicia.page
https://www.canadapost-postescanada.ca/scp/fr/outils/vignettes-postales.page