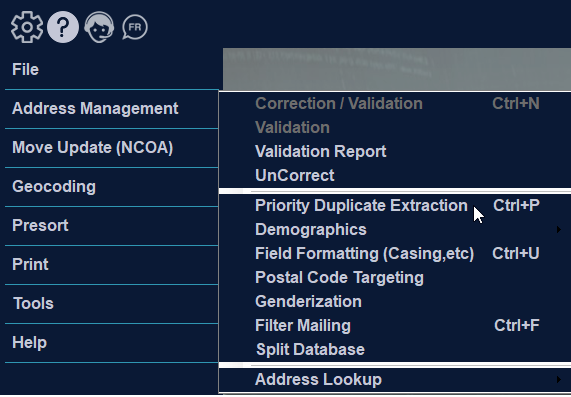
Priority Duplicate Extraction
Duplicate extraction utility allows you to identify and selectively remove duplicate records from your database. If you merge 2 or more files, you can identify records that are common between them. This is useful for removing suppression lists, also known as Kill Files.
From the Address Management menu, select “Priority Duplicate Extraction”. Click “Process” to preform the extraction.
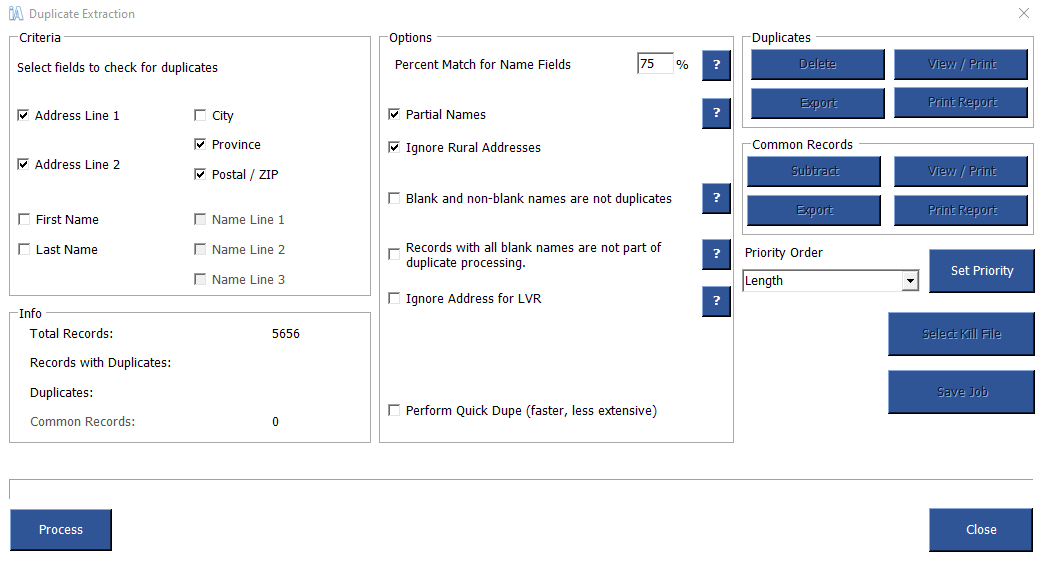
By default, iAddress™ checks for duplicate records based on address. You can customize your duplication by choosing some, all or no parts of the address. “City” is not selected by default to take into account alternate city names (for example Elk Falls, BC/Campbell River, BC or North York, ON/Downsview, ON).
You can also include other fields to identify duplicates. These are as follows:
- First Name
All records with the same First Name will be identified. First Name will only be available if you have bound the first name field when creating your job.
- Last Name
Records with the same Last Name will be identified. Last Name will only be available if you have bound the Last Name field when creating your job.
- Name Line (1, 2, 3)
Records containing the same information in the appropriate name line will be marked as duplicates.
- Partial Names
Records are identified if the names are similar. For example, Commercial Bank, Commercial Bank of Canada and Commercial would be considered duplicates as long as the addresses were the same.
- Ignore Rural Addresses
By selecting this option, iAddress™ will not check rural addresses for duplicates.
- Blank and non-blank lines are not duplicate
If no data is contained in a field, iAddress™ will consider this to be a unique entry and will not match it to non-blank entries.
- Records with all blank names are not part of duplicate processing
Any records where all the name fields are blank are left out of the process while checking for duplicates.
Percent match
The percent value entered in this box allows the user to determine how similar two name fields must be before they are identified as duplicates. The higher the percent, the more exactly two name fields must match. To find exact matches, the percent should be set at 100. Lowering the percent value will allow for spelling mistakes.
Processing duplicates
To check your database for duplicates, select the “Process” button and the progress bar will be displayed above the buttons. All records identified as duplicates are flagged; common records are those identified in your suppression list (Kill File) that appear in any other databases merged into your job.
When processing is complete, you can choose to view your duplicates or common records or delete them.
Duplicate report
Click Print Report to produce a detailed description of your duplicate extraction results.
To view duplicates
Selecting the View/Print will open the View Database screen with the Duplicates selected. From this screen, you can print a list of duplicate addresses or selectively delete them. You may also flag or de-flag records as a duplicate.
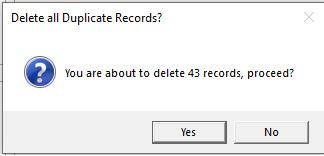
Deleting duplicates
Duplicates may be automatically removed using Delete Duplicate Addresses.
Note:
iAddress™ will automatically retain the first occurrence of the addresses and delete all additional duplicates found.
Information about duplicates can be exported using the Extra Control Fields option on the Export Database screen.
To run your job
After selecting all your options, click “Process”.
To stop this process while it is running, click “Cancel”.
Using a kill file
Kill/Do Not Mail files (suppression lists) are used to remove addresses from the main database(s). If you have merged more than 2 files, you will need to identify the kill file. Click the “Select Kill File” button and choose the appropriate file. After processing, all records matching the Kill file will be marked as common. You can view, print and/or export these records. When you are ready to remove the Kill file and all matching records, click subtract.
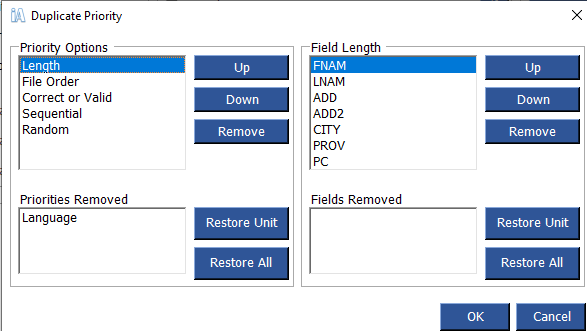
Setting priorities for duplicates
You can decide which of your duplicate identification criteria is more important by setting priorities.
Deduping before correction
If you process your duplicates before correcting your file, you should choose the Perform Precorrection option. This option corrects and standardizes your records to produce the best results.
Once your Criteria and Options are selected, click Set Priority. The following screen will appear. You can determine which options are most important by moving them up and down the list. If you don’t want to use a particular option, you can remove them. You can move items related to each option in the right hand box. You can also delete them, if they are not important to your duplicate extraction.
Length
This option selects the duplicate with the most number of characters. For example, if this option were selected for the First Name field, JONATHON would be considered a higher priority duplicate than J or JOHN. When you delete your duplicates, JONATHON would be retained while J and JOHN would be deleted.
File order
If you have merged two or more files, you can determine which file is more important when determining duplicates. For example, if the third file you merge into your job is your main customer list, you can select this as the priority. If duplicates are found in your file, duplicates found in your main customer list will be considered a higher priority. When you delete your duplicates, the record from this file would be retained while the others will be deleted.
Language
This option will prioritize duplicates by language. If English has been selected as the priority, French duplicates will be deleted before English ones.
Correct or valid
Part of the standard normalization process involves a correction/validation. You can use this information to set priorities with your duplicates. By selecting this option, when duplicates are found, valid addresses will receive a higher priority. When you delete your duplicates, a valid record would be retained while others will be deleted.
Random
If two or more entries are exact matches, this option randomly selects one over the others. This option is always the “last resort”, that is, if other priorities have been selected and there are still duplicates remaining, the random selection will happen.
Note:
The drop-down list beside the Set Priorities shows the priorities you have selected and the order in which they will be applied to your job.
Superior record creation
This option allows you to create one record using parts of two or more duplicate records. Once you have processed your duplicates, you can access this feature by clicking the “View/Print” button and selecting “Merge” from the View Database screen. You can then select components from each duplicate record to create a single entry in your database.